Posts

Showing posts from February, 2023

Pre-Production (6)

Image
 This is the biggest and final part of our planning document. We will know be finishing this document with the shot list. We discussed what will be going on in these specific shots and what camera movements and framing will be used.

Pre-Production (5)

Image
 This part of pre-production is the shortest and we will be focusing on the Save The Cat Beat Sheet Narrative. All of the plot points in the film are defined here.

Pre-Production(4)

Image
 In this part of pre-production, we will be focusing on our supporting characters and the world these characters reside in. The characters demographics and costumes were discussed here. The facial expressions and body language were also huge factors when discussing the characters. We also talked about the locations of the film and what they looked and felt like. The time, tone, and lighting was also taken into account here.

Pre-Production (3)

Image
 In the part of pre-production, we will be creating a logline which is one sentence summary of a film. Our logline is "A comedian is possessed by a demon, and he must feed him joy and laughter or the demon will go on a rampage and kill people". We also defined our main character telling everything about him.

Pre-Production (2)

Image
 In this part of pre-production, we are discussing ideas for the film opening and putting ideas on the document. We talk about what issues will be discussed in the film and what stereotypes will be challenged. The setting and time of film is also mildly brought up here.

Pre-Production Phase (1)

Image
In this phase of pre-production, me and teammates discussed what the main target audience and demographic of the film would be. We also discussed how we would influence people to see our film. We documented the film crew and the cast as well.

Pre-Production Phase

Image
 Pre-production is work done on a product before any real full-scale production begins. The goal of pre-production is to use your time on things like props, finalizing your budget, selecting preferred equipment, and finding the right special effects and wardrobes for sets. We chose the name pure evil entertainment because we wanted to be known for making the most vicious films. We chose a dim light going out because in our films there will always be a sense of eeriness. The dark hallway was chosen because the films have a sense of helplessness in them. The colors gray and black were chosen simply to build off our previous design choices of focusing on eeriness and helplessness. Pure Evil Entertainment is made up of Eric, Ashton, Ezert, and Taejuan to make the best horror films to our ability. 

Activity 3: Camera Movement Video Blog

 The main purpose of the assignment was to take 6 parts of out previous assignment and put them onto screen. This assignment did a great job giving us a feel for how filming would go for the actual movie when we do start filming that. Ashton Me and Ezert all swapped while shooting depending on who was in the scene but we used Ashton’s phone for the entire process. Ashton did most of the camera work definitely. I was in most of the scenes for the assignment. Ezert pretty much did a hybrid of both. The most uncomplicated camera technique was the zoom because all phones accommodate for that well. Our group had a lot of fun during our short time filming. We had a lot of bloopers and even the final products could definitely be better. An Android phone was used during filming unfortunately I’m not sure which specific model it is. The quality of the video isn’t great either for some reason because when they sent they came in bad graphics. Overall our team did a pretty solid job in my opinion.

Activity 2: Camera Movement Video Storyboard

Image
  This exercise is called the camera movement video storyboard and the purpose of the exercise was to introduce us into planning. This exercise was used to give us a feel of planning, so we have an idea of what we need to film and go onto film 6 of these 9. This assignment will be great as reference and will make the filming process a lot smoother our team won't be planning as we go. This assignment taught us that whenever you plan you succeed, and the overall experience goes faster. The assignment also made us think hard about what we really wanted to film and what manner we wanted to go about filming it.

Introduction to Camera Movement

Image
  In this assignment me and my teammates worked on the assignment in order to analyze and discover certain types of camera movement. Camera Movement is a technique that helps the viewers understanding on how a camera moving enhances the story. Specific camera movements help enhance viewers understanding without unnecessary editing. Camera moving does a great job in influencing viewers emotions without having to add extra effort. Overall camera movement is a necessary good because all it does is help the movie. The camera operator is the one responsible for camera movement. A great camera operator is James Cameron who has done phenomenal work on avatar. James does a great job capturing the world of avatar and conveying the many emotions on characters just from camera movement alone. Christopher Nolan who has made one on the best comic book films is also great camera operator as he emphasizes the cold but calculating person that is the Joker through camera movement is also shows the Batm

Camera Composition

Image
  For this blog post I will be documenting my progress on the camera composition portion of the PowerPoint. This part of the PowerPoint definitely required the most creativity and it was a good test to see if we could put all of the techniques we have learned together. Below you will see a couple of my examples from the power point, and you may be able to notice some minor things in the shots. For the leading lines shot if you look close enough you will see someone banging on the door. For the Asymmetry shot if you also look close enough to the left you will see someone clearly hiding behind the door. This is definitely the most creative portion of the PowerPoint as we used our surroundings very well. This part of the PowerPoint was the most challenging but the payoff was definitely worth it.

Framing Techniques in film

Image
For this blog post I will be documenting my process on the framing techniques in film portion of the PowerPoint. A lot of these shots were easy to get done especially with the preliminary exercise as guidance. This part of the PowerPoint is also the most like our original   vision, shots like the knee and the hip shot were amazingly adapted. We didn’t end up need any other students for this part of the PowerPoint as most of the shots were very straightforward and didn’t require too many people. The hip level shot is our best shot overall and it took a few takes to perfect the shot. The knee level shot was also done very well, and my teammate did a great job keeping his balance so we could perfect this shot. Overall, I think we did a good job using framing techniques in film.  

Camera Angles

Image
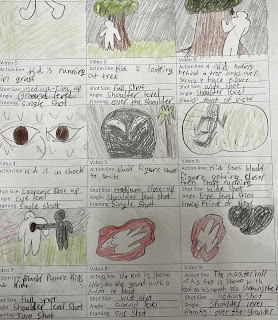
For this blog post I will be sharing my progress on the camera angles portion of the PowerPoint. Like I mentioned in the blog before I used previous preliminary exercises for references on shots and refresher on how these shots work. Like the shot sizes portion of the PowerPoint a few of these shots had to be scrapped because they just were not possible. The One, Two, Three, and Four shots showcased more gruesome shots, but we ended up not going with that because we wanted a comedy, so we didn’t want it to seem too dark. We asked a couple of students around if they could help us with certain shots, but we were unable to reference them in the PowerPoint because none of us knew them. For the crowd shot we just used other students in the media studies class. Overall, this part was by far the most fun part on the PowerPoint and me and my teammates had the easiest time getting through this part.

Shot Size

Image
For this blog I will be documenting my progress on the shot sizes portion of my PowerPoint. For the research on how to use the shots I used my previous preliminary exercises. In the PowerPoint we had to scrap some of our original plans because we couldn't find the right setting for certain shots like the Crowd Shot. Each of our team members took on each section of the PowerPoint. We did all of the shot sizes portion of the PowerPoint with only us, so we had no collaborators. The establishing shot and the full shot had the most impact out of all of our examples and they were the easiest to explain.